
Assigning Roles
You assign roles to team members from Settings → Team. Each member has exactly one role, which controls everything they can see and do in the dashboard.
Invite a new team member
-
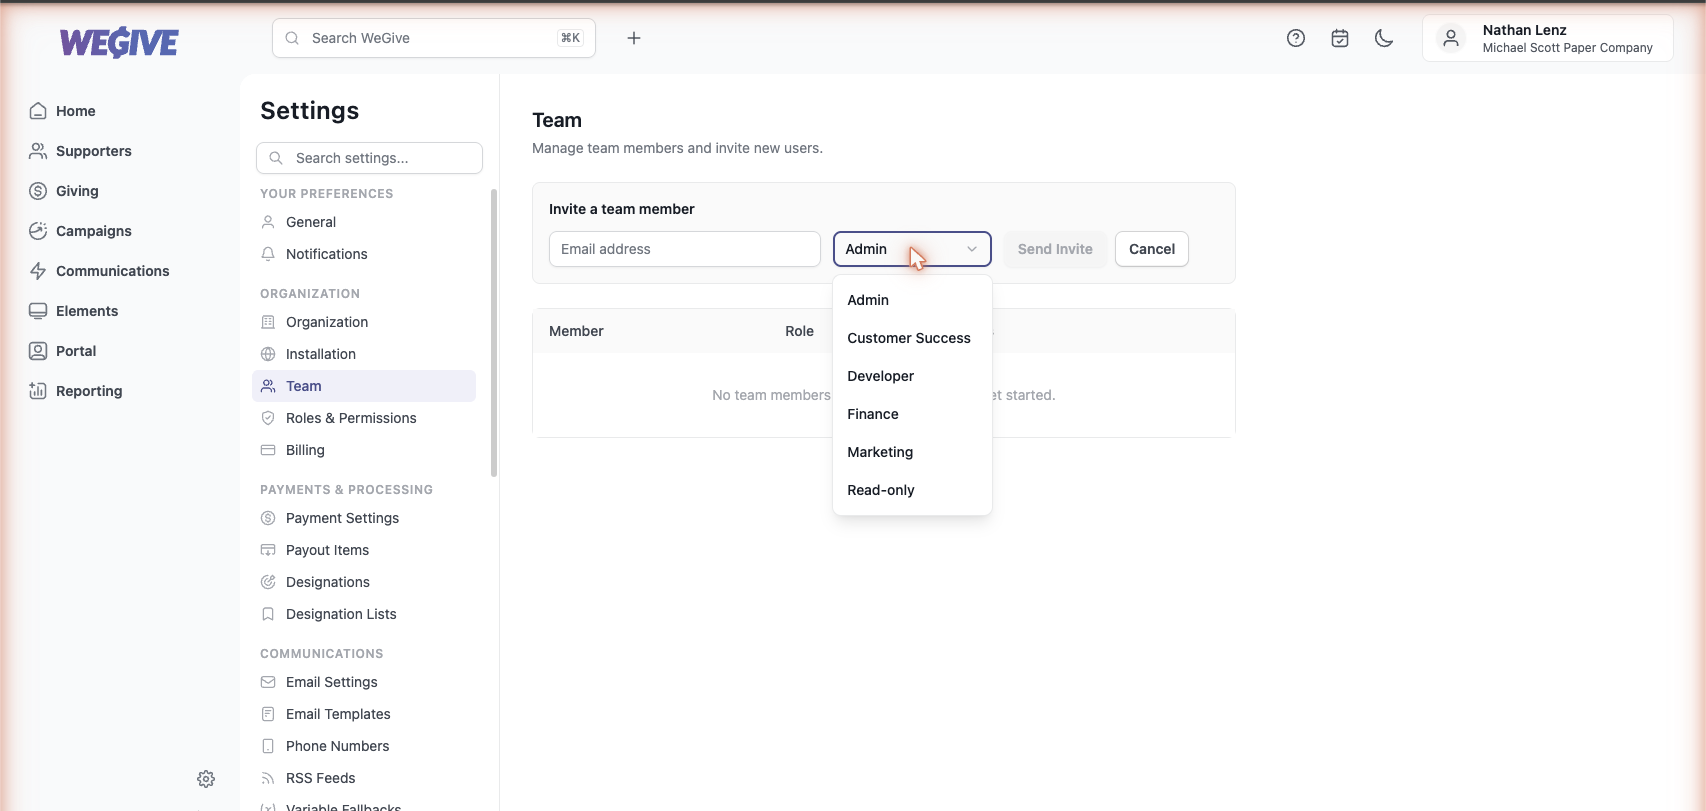
Go to Settings → Team and click Invite Member.
-
Enter the new member’s email address.
-
Choose a role from the dropdown. You can pick any of the six managed roles — Admin, Customer Success, Developer, Finance, Marketing, or Read-only — or any custom role your organization has created.
-
Click Send Invite. The member receives an invitation email; once they accept and sign in, their access is governed by the role you selected.
Change an existing member’s role
-
Go to Settings → Team.
-
Find the member in the team list and change their role using the role control on their row.
-
The new role takes effect immediately — the member’s navigation, pages, and available actions update to match.
Good to know
- One role per member. Each team member holds a single role at a time. Choosing a new role replaces the previous one.
- The backend is authoritative. Hiding a menu item is a convenience; the real enforcement happens on the server. Even if someone navigates directly to a page they can’t access, the underlying data is protected.
- No access is the safe default. A member who hasn’t been assigned a role can sign in but sees nothing until you assign one — there’s no accidental over-sharing.
Support
Need help structuring roles for a larger team, or have a use case the six managed roles don’t cover? Email support@wegive.com.